Web3 public sensors map
Welcome to the decentralized opensource sensors map which operates with the sole intent of serving the free will of individuals , without any beneficiaries. It offers two distinct layers of decentralization at your choise: peer-to-peer connectivity for direct access to sensor data, and the federative concept for accumulating sensor data and displaying measurement history. Click here for further technical details.
Map data © OpenStreetMap contributors
Your bookmarked sensors
Altruist Setup Guide
Follow these steps to set up your Altruist sensor and connect it to the open sensor network at sensors.social.
Set Up Your Altruist Urban
Altruist Urban is an outdoor air quality monitor measuring particulate matter (PM2.5 / PM10), temperature, humidity, atmospheric pressure, and noise level.
Download PDF instruction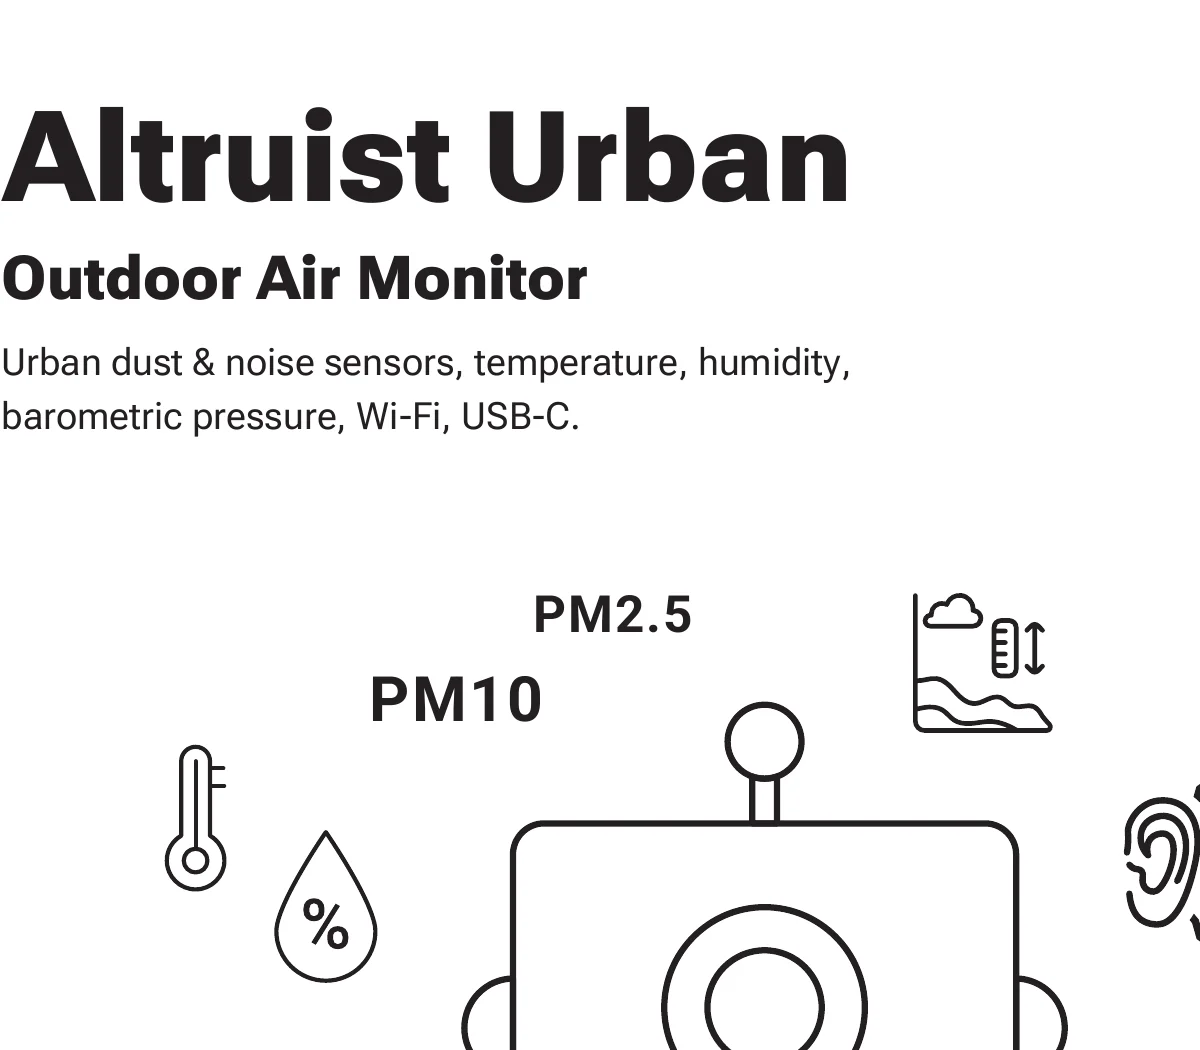
Full setup diagram
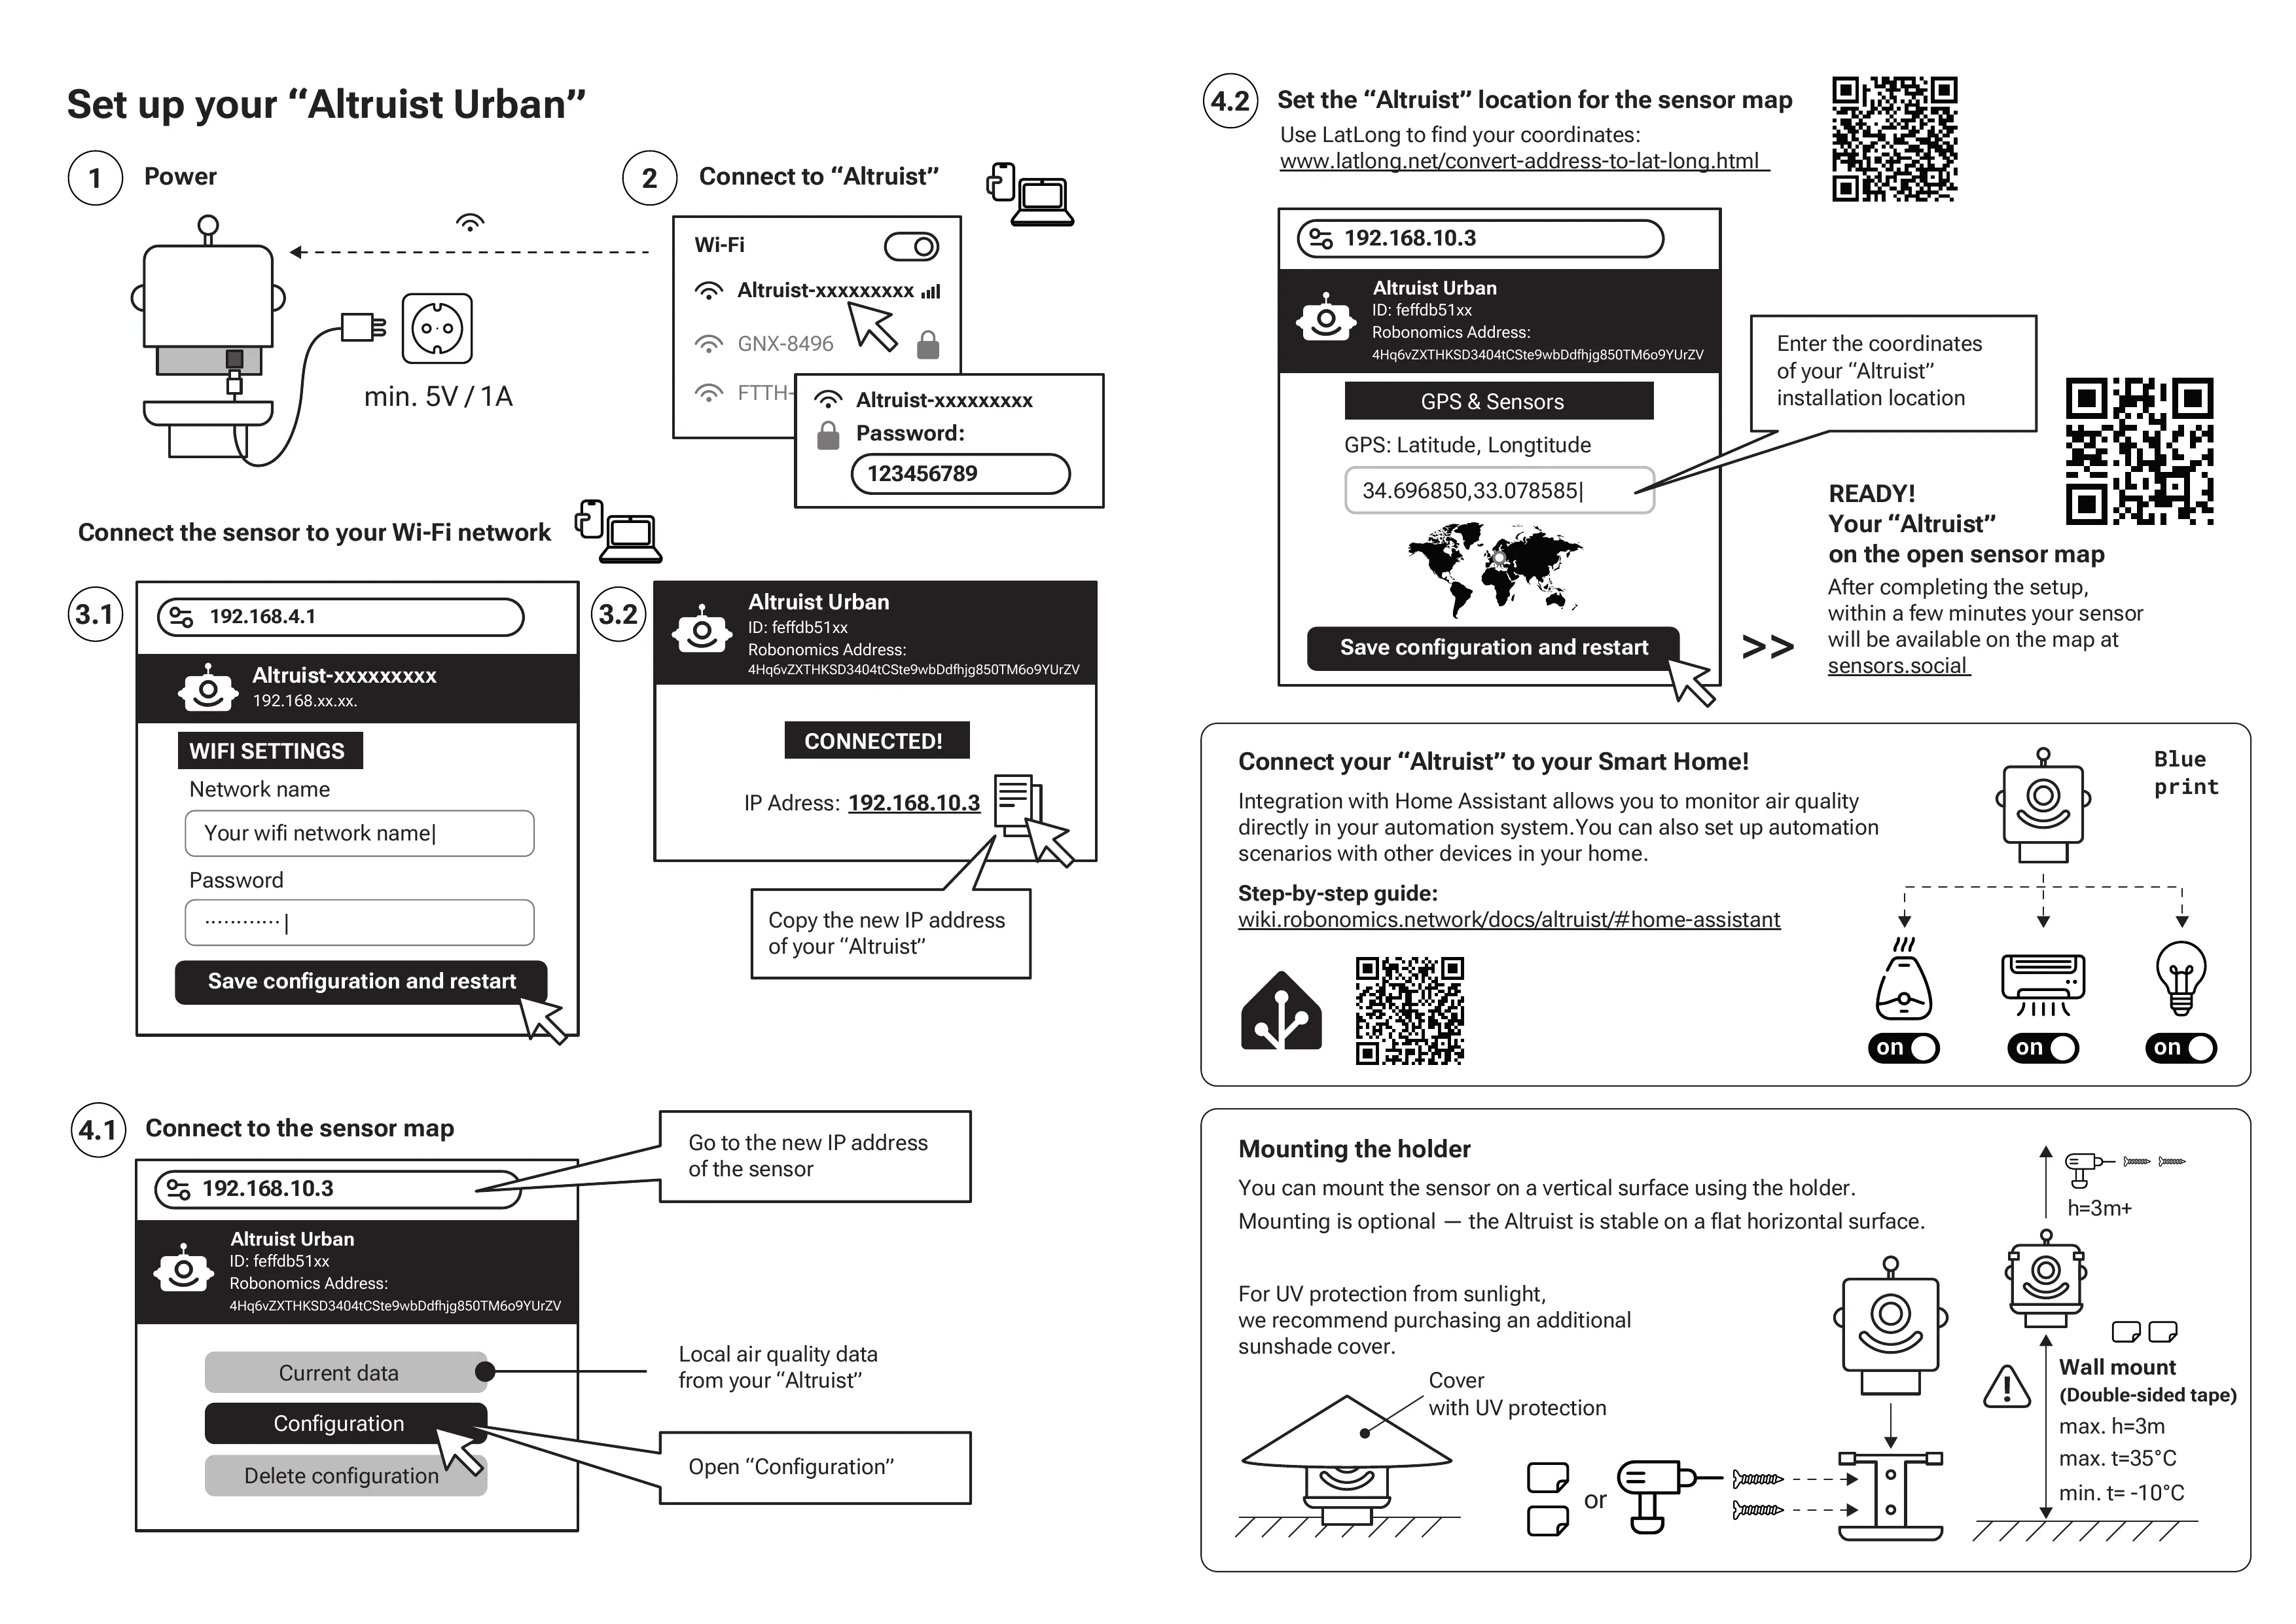
Step 1 — Power
Connect the sensor to a USB-C power source. Minimum requirement: 5V / 1A.

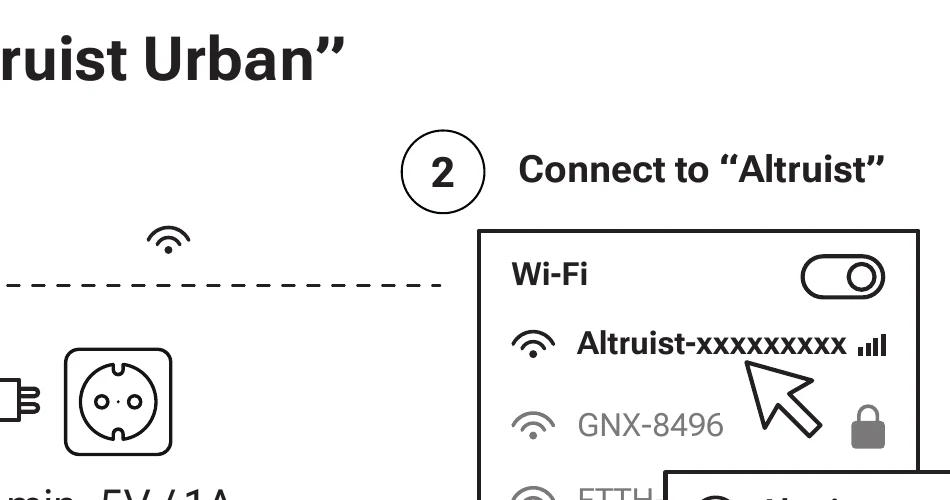
Step 2 — Connect to the Altruist
- Scan the QR code with your phone camera, or find the Wi-Fi network «Altruist-xxxxxxxxx» in your device settings.
- The access point becomes active shortly after powering on.
- Enter the password:
123456789
Step 3 — Connect to Your Wi-Fi

- 3.1 Open your browser and go to
192.168.4.1 - Enter your home Wi-Fi network name and password in «WIFI SETTINGS».
- Click «Save configuration and restart».
- 3.2 After restart the device shows status «CONNECTED!» and a new IP address (e.g. 192.168.10.3).
- Copy the new IP address of the Altruist.
Step 4 — Connect to the Sensor Map
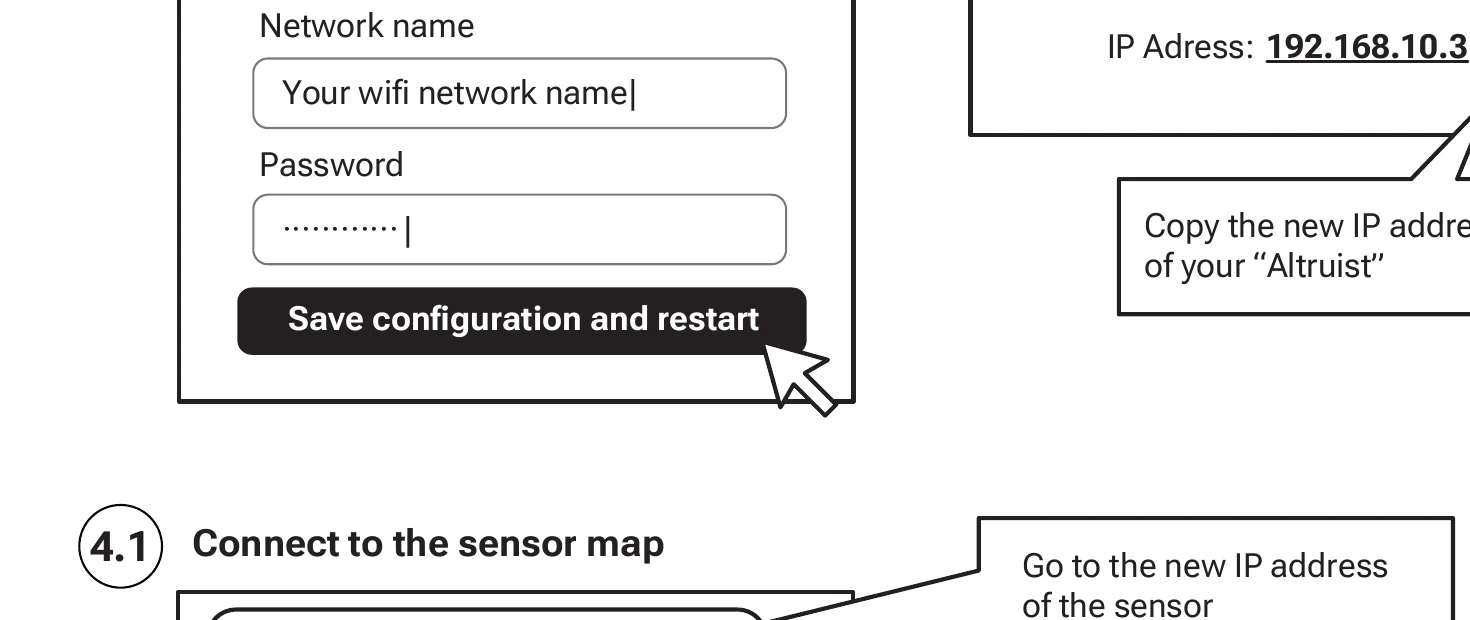

- 4.1 Open the new IP address in your browser. Click «Configuration».
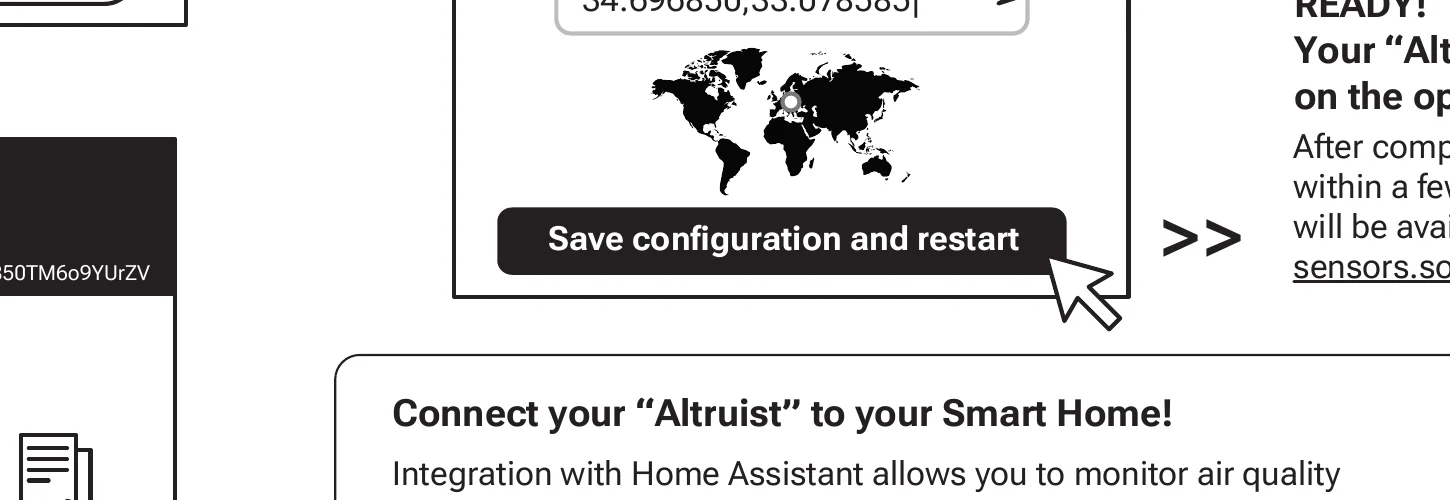
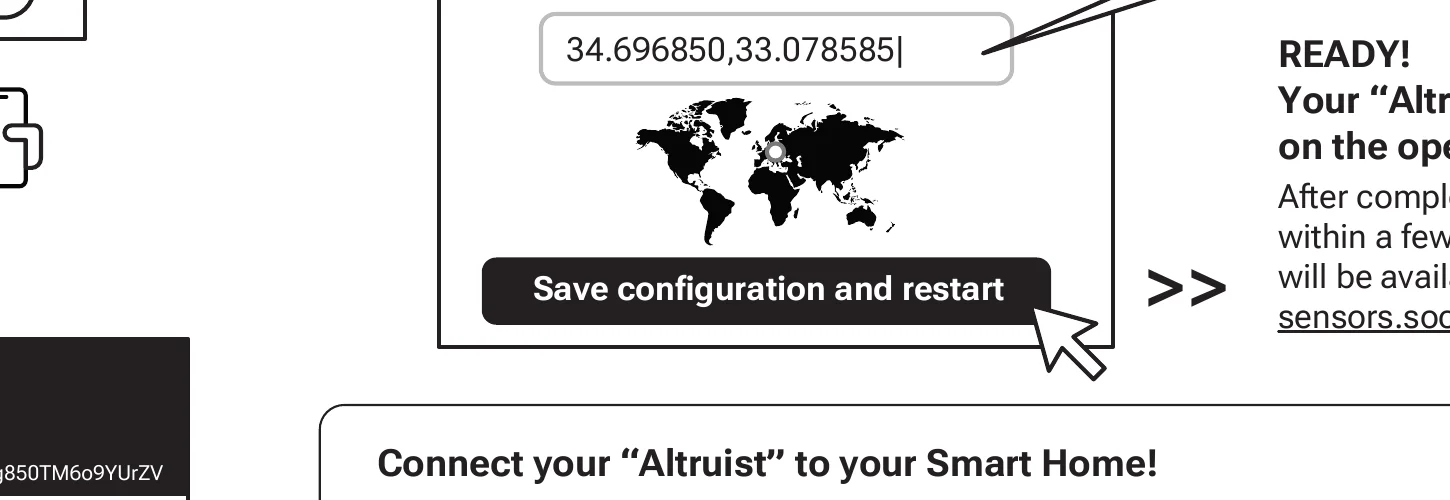
- 4.2 Go to «GPS & Sensors» and enter the GPS coordinates of your sensor's location.
- Use latlong.net to find coordinates by address.
- Click «Save configuration and restart».
Done! After a few minutes your sensor will appear on the open sensor map at sensors.social
Mounting
You can mount the sensor on a vertical surface using the included holder.
- Mounting is optional — the Altruist is stable on any flat horizontal surface.
- For UV protection from direct sunlight, we recommend an additional sun visor.
- Wall mount (adhesive sticker): max height 3 m, operating temperature −10 °C to +35 °C.
- Recommended installation height: 3 m or above.
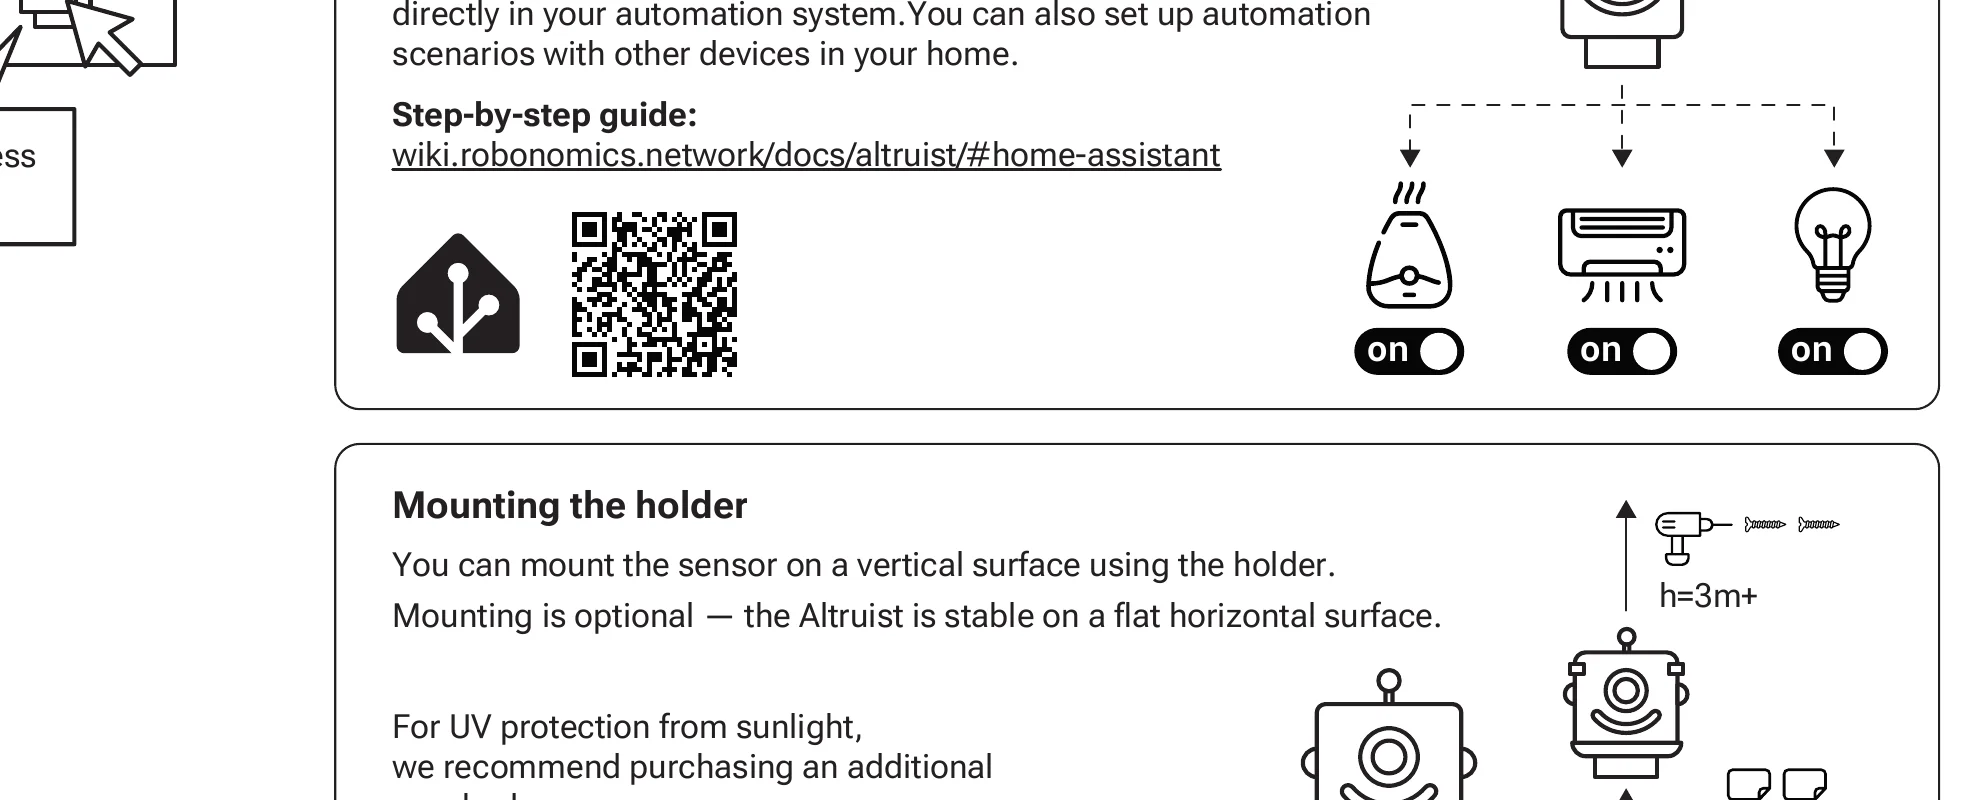
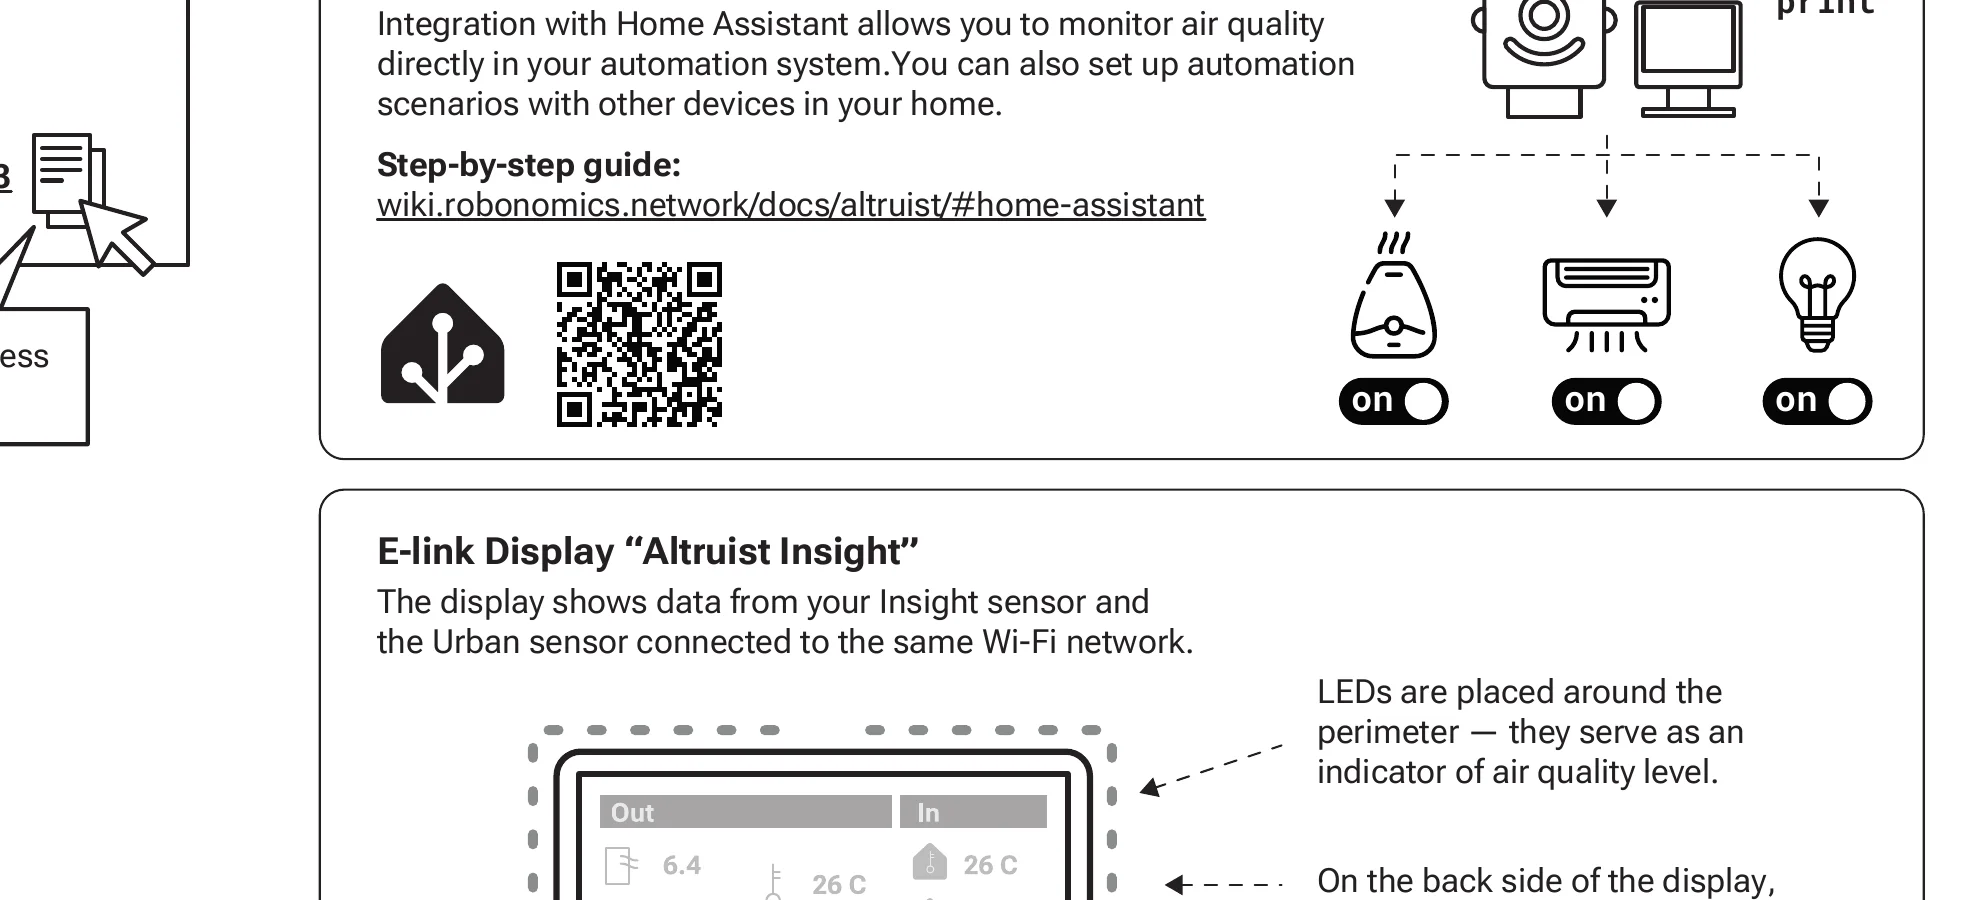
Connect to Home Assistant
Home Assistant integration lets you track air quality directly in your automation system. You can also create automation scenarios with other devices in your home.
Step-by-step guide: wiki.robonomics.network/docs/altruist/#home-assistant
Set Up Your Altruist Insight
Altruist Insight is an indoor air quality monitor with an e-ink display, measuring CO2, temperature, humidity, and atmospheric pressure.
Download PDF instruction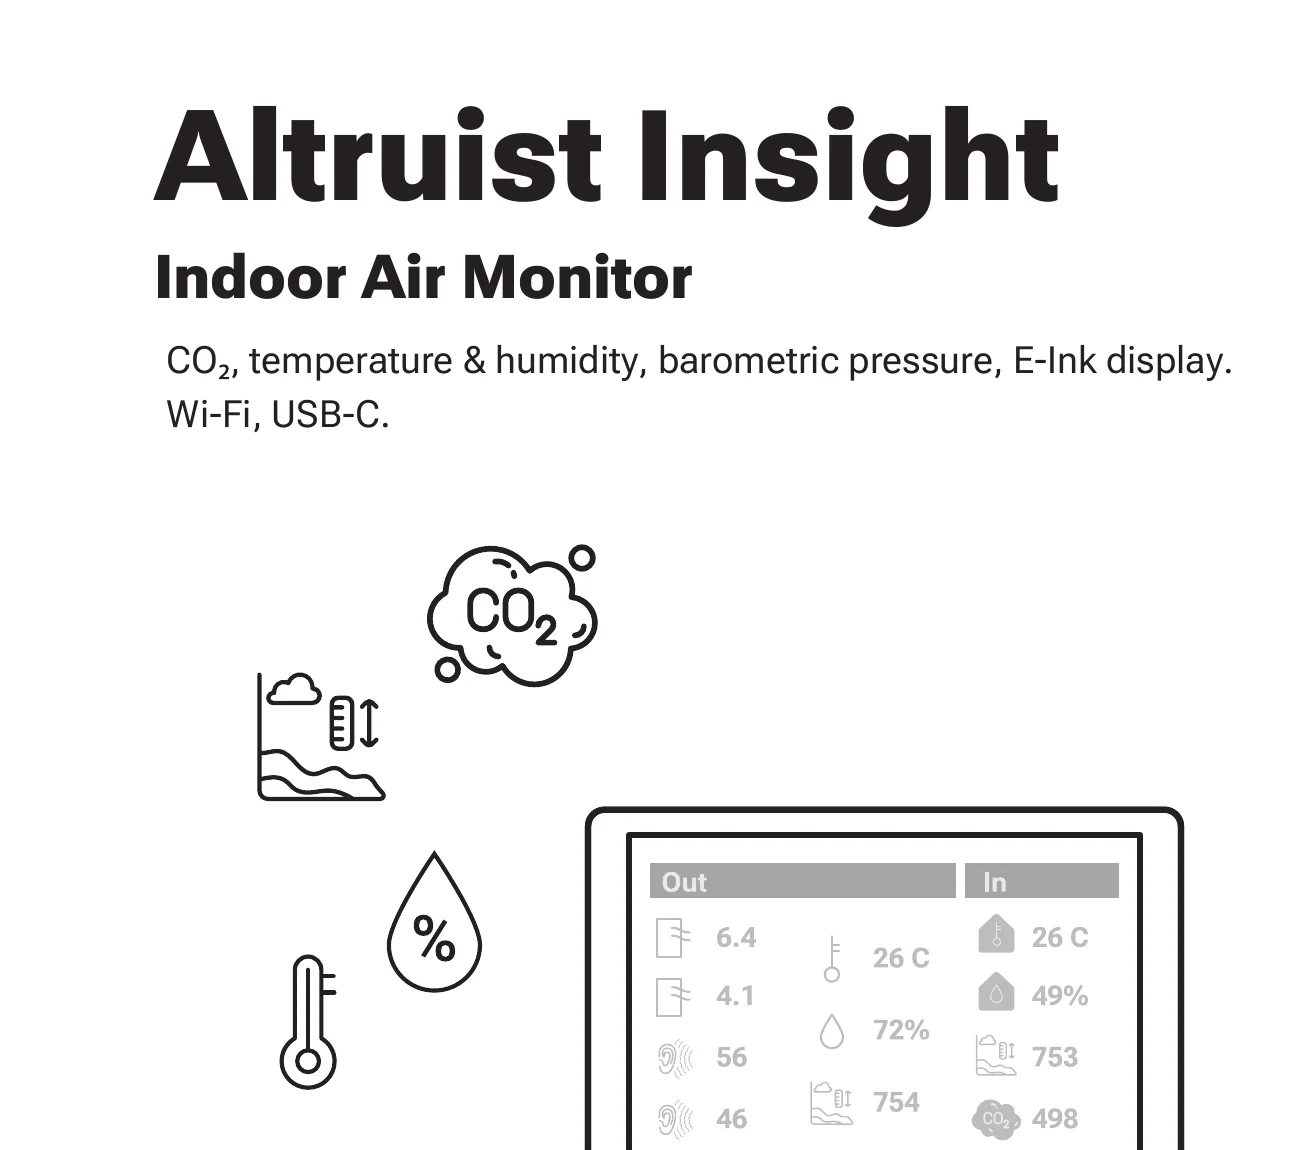
Full setup diagram
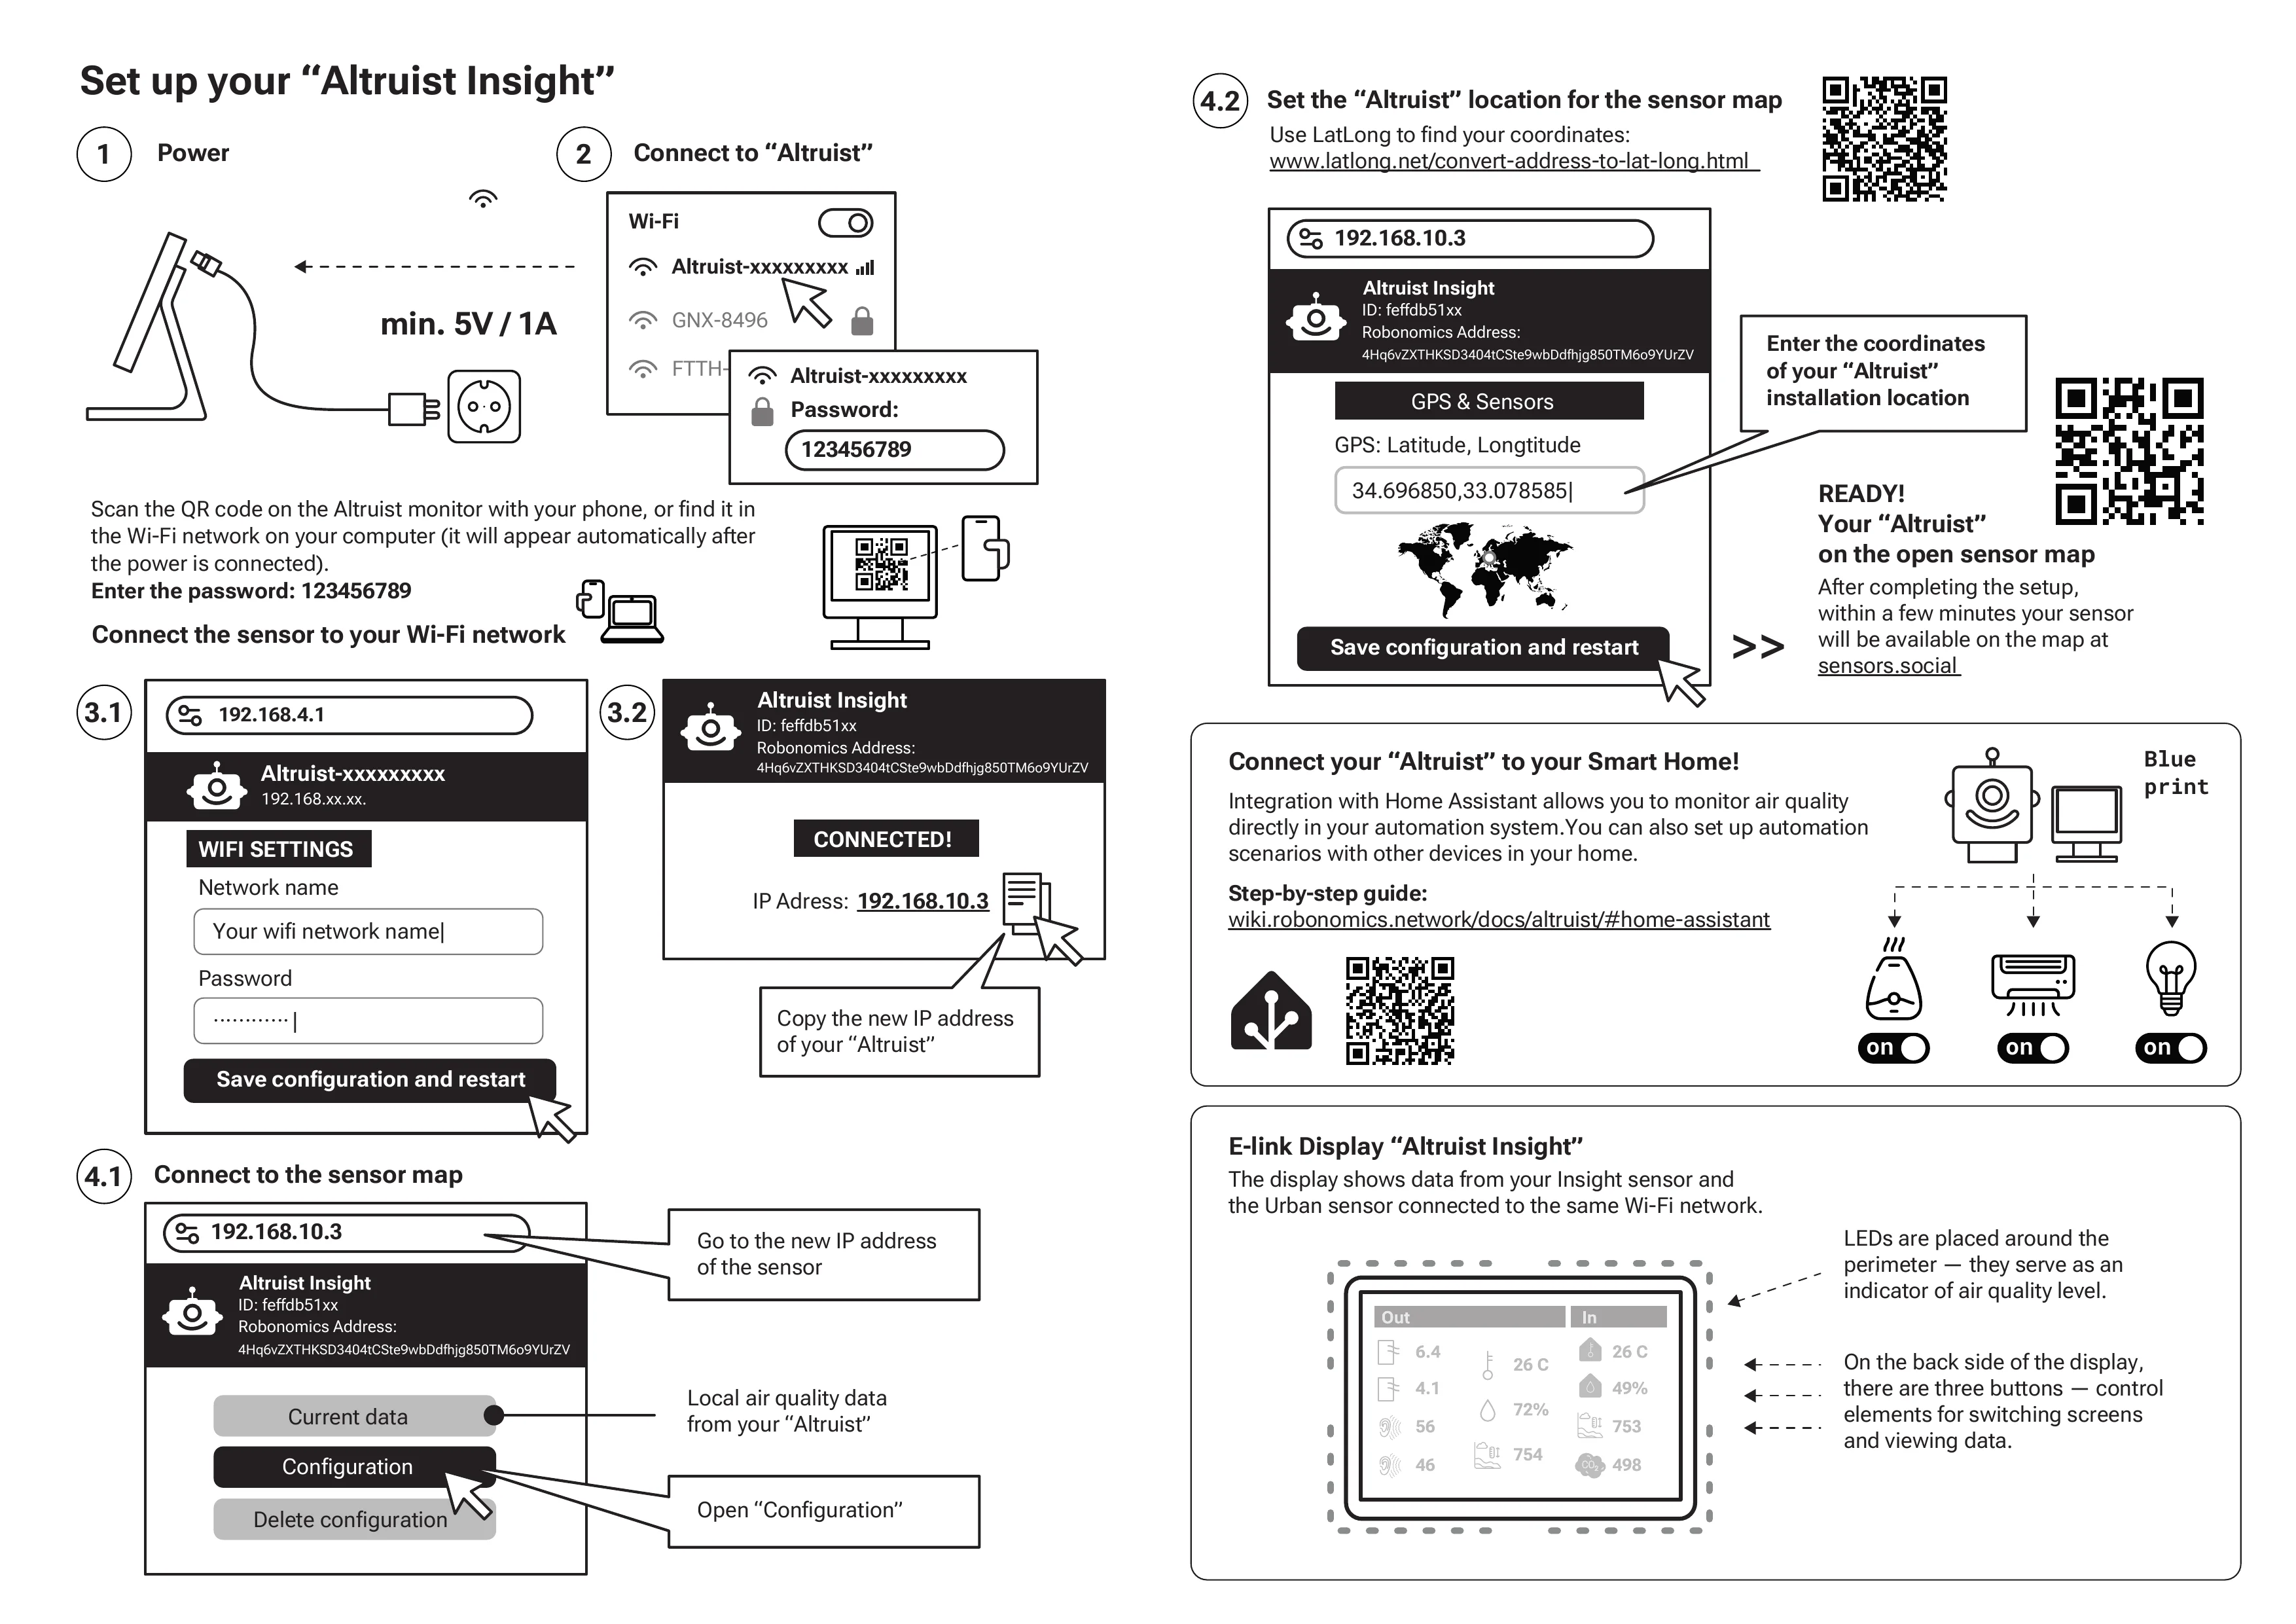
Step 1 — Power & Step 2 — Connect to the Altruist
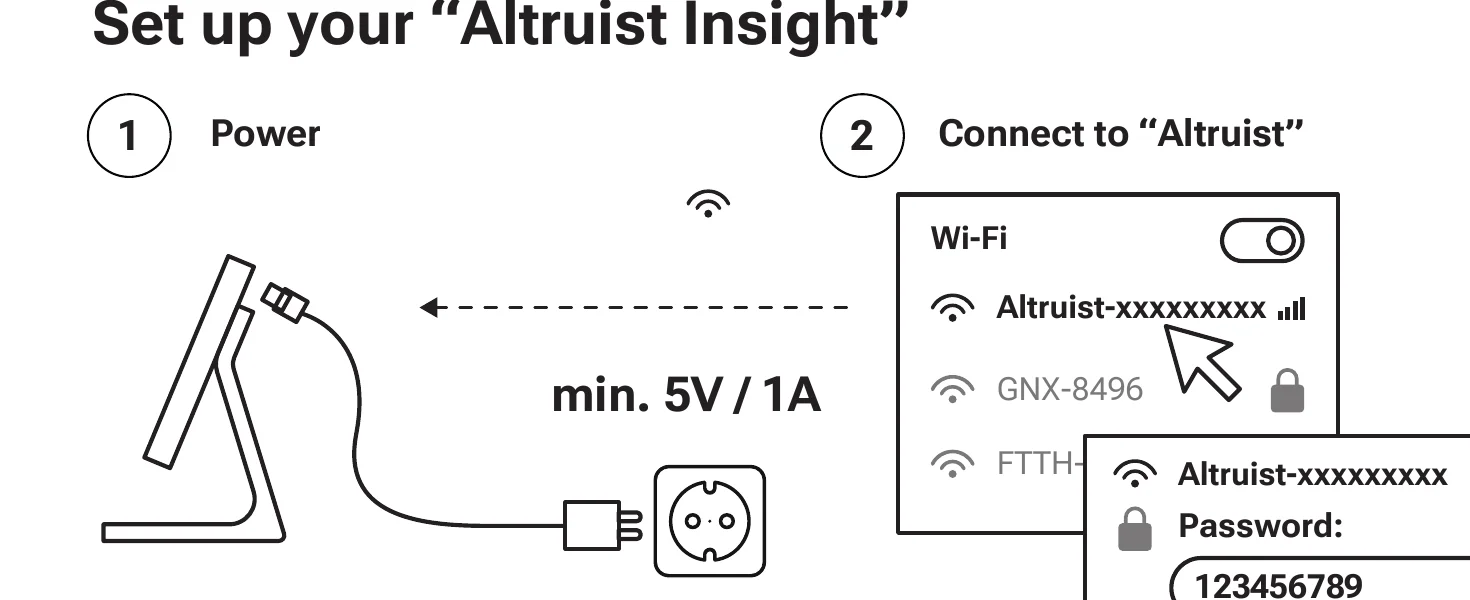
- Connect the sensor to a USB-C power source. Minimum requirement: 5V / 1A.
- Scan the QR code with your phone camera, or find the Wi-Fi network «Altruist-xxxxxxxxx» in your device settings.
- The access point becomes active shortly after powering on.
- Enter the password:
123456789
Step 3 — Connect to Your Wi-Fi

- 3.1 Open your browser and go to
192.168.4.1 - Enter your home Wi-Fi network name and password in «WIFI SETTINGS».
- Click «Save configuration and restart».
- 3.2 After restart the device shows status «CONNECTED!» and a new IP address (e.g. 192.168.10.3).
- Copy the new IP address of the Altruist.
Step 4 — Connect to the Sensor Map
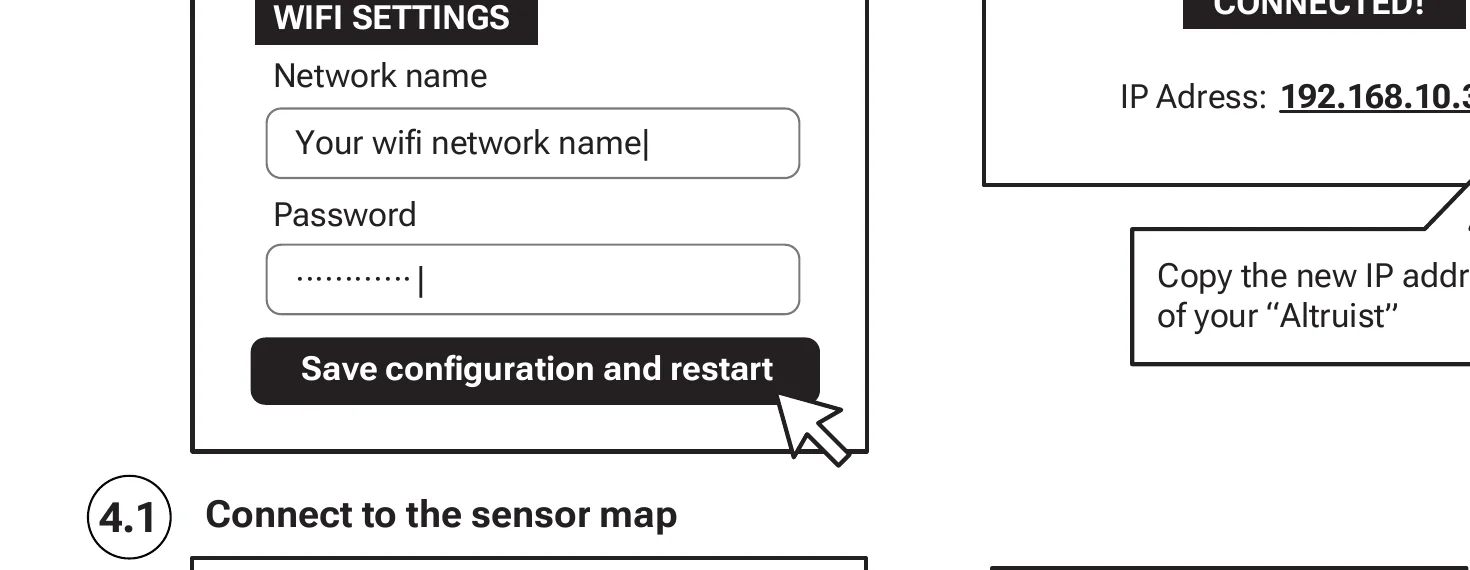
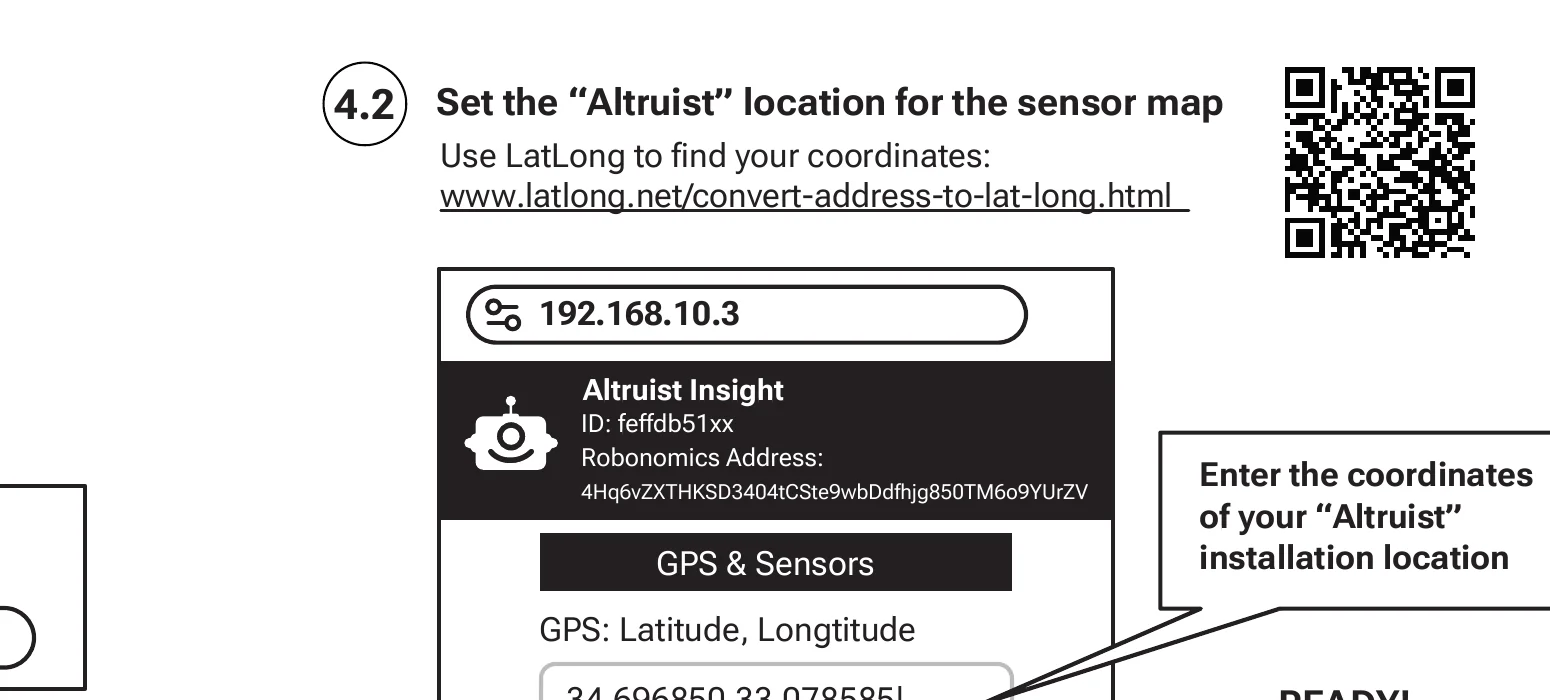
- 4.1 Open the new IP address in your browser. Click «Configuration».
- 4.2 Go to «GPS & Sensors» and enter the GPS coordinates of your sensor's location.
- Use latlong.net to find coordinates by address.
- Click «Save configuration and restart».
Done! After a few minutes your sensor will appear on the open sensor map at sensors.social
E-ink Display
The display shows data from your Altruist Insight sensor and a connected Altruist Urban sensor on the same Wi-Fi network.
- LEDs around the perimeter indicate the current air quality level.
- Three buttons on the back panel let you switch screens and browse data.
Connect to Home Assistant
Home Assistant integration lets you track air quality directly in your automation system. You can also create automation scenarios with other devices in your home.
Step-by-step guide: wiki.robonomics.network/docs/altruist/#home-assistant
UV Cover for Altruist Urban
Outdoor protection against sun and rain with UV resistance. Made from ASA plastic.
- Recommended installation height: 3 m or above.
- Wall mount (adhesive sticker): max height 3 m, operating temperature −10 °C to +35 °C.
In the box: 1 Cover, 1 Wall mount, 2 Screws, 2 Double-sided tapes, 1 User manual
Download UV Cover instruction
Technical Specifications
Altruist Urban
| Power | 5V (USB-C) |
| Wireless | Wi-Fi 2.4 GHz (802.11 b/g/n) |
| Sensors | SDS011 — PM2.5 / PM10 (µg/m³) BME280 — Temperature (°C/°F), Humidity (%), Pressure (hPa) ICS43434 — Noise (dB) |
| In the box | Sensor module, USB-A to USB-C cable, wall mount, double-sided tape (×2), external antenna, user manual |
Altruist Insight
| Power | 5V (USB-C) |
| Wireless | Wi-Fi 2.4 GHz (802.11 b/g/n) |
| Sensors | SCD41 — CO2 (ppm) BME680 — Temperature (°C/°F), Humidity (%), Pressure (hPa) |
| In the box | Sensor module with e-ink display, USB-A to USB-C cable, user manual |
Need help? Contact support: support.cyberpunks.shop