Your Altruist, screen by screen: short video guides
Our firmware developer recorded a short video for every screen of the Altruist interface. Here they are, in the order you will need them.
The Altruist web interface now works like an app: Local for readings and device settings, Map for everything that goes to sensors.social, Custom for Home Assistant and other integrations, and System for updates, backup and resets. A sidebar on a computer, tabs on a phone.
Yulia, who writes the Altruist firmware, recorded a short video for each screen. No voice-over, just the clicks, so you can follow along at your own pace.
First setup
Connect to your Wi-Fi
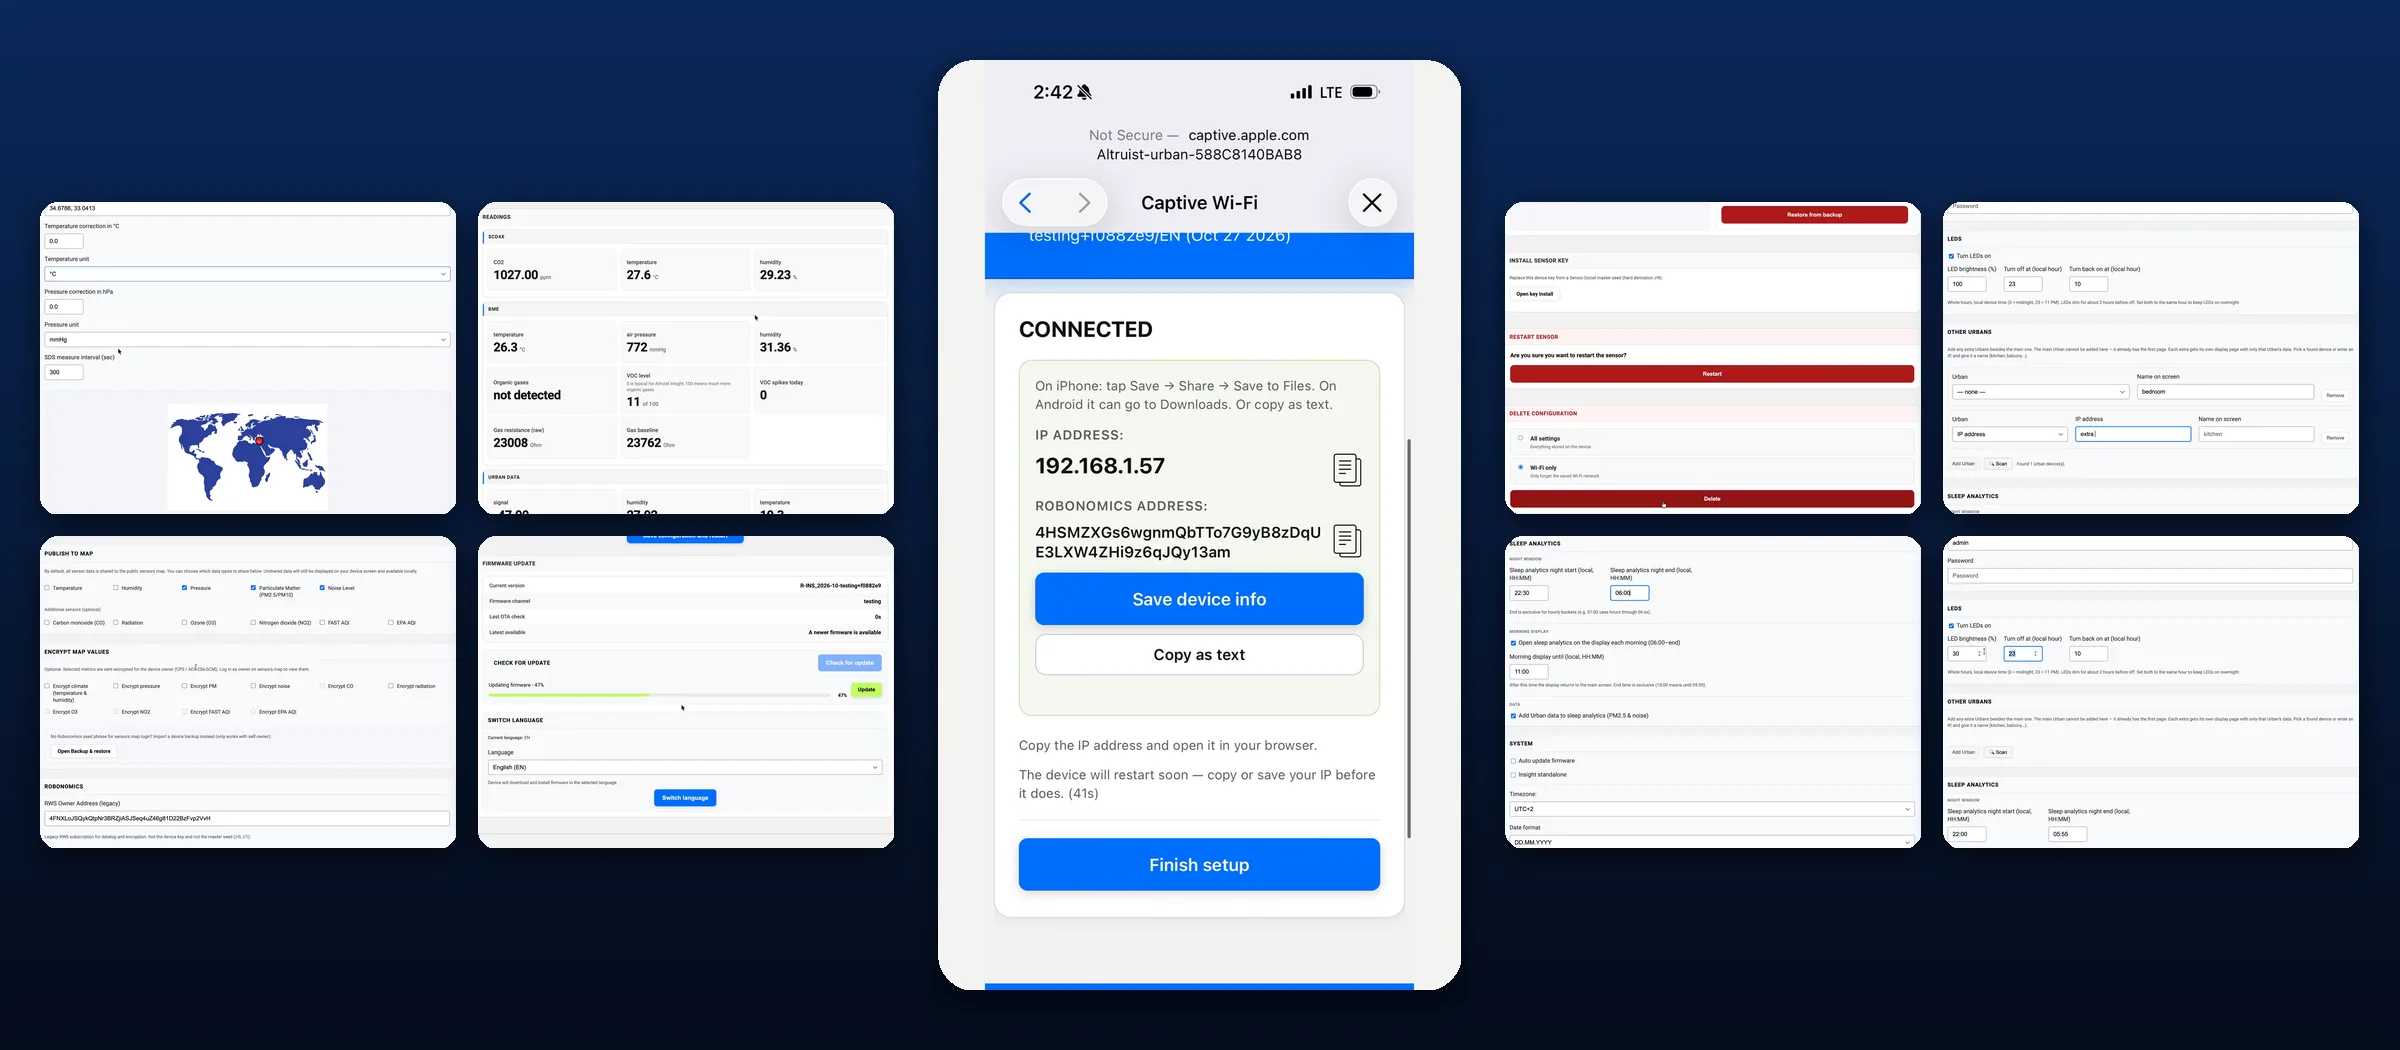
Join the Altruist-… network from your phone and the setup page opens by itself. Pick your home network (2.4 GHz), type the password, and wait for Connected. Save the IP address the page shows, then press Finish setup.
Put your sensor on the map
Map → GPS & Sensors: enter latitude and longitude and check the marker on the small map. The coordinates are public. A point a block away keeps your home private and the data just as useful.
Everyday use
Readings and status
Local → Readings shows every value the sensor measures. Status tells you whether it is online, whether the last data reached the map, its IP and its address. Copy all puts the technical details on your clipboard, handy when you write to support.
Choose what goes public
Map → Publish to map: tick the values you want on the open map. Encrypt map values: the ticked values leave the sensor sealed and open only for you, after you log in on sensors.social with your key or your backup file. Untick everything to keep the sensor fully private.
Network settings (advanced)
Map → Robonomics: how often the sensor writes its signed log, which node it talks to, and the RWS Owner Address (legacy) field. That field holds a subscription address, not the sensor’s key. Most owners never need to touch this screen.
Updates, backup and resets
Check for a firmware update
Local → Firmware Update → Check for update compares your version with the latest one. Press Update and watch the progress bar. Keep the sensor powered until it restarts.
Download a backup
System → Backup & restore → Download backup saves one backup.json file: Wi-Fi, location, settings and the sensor’s key. Keep it away from the sensor, for example in your password manager.
Restore from a backup
Same screen: choose the file and confirm. The sensor restarts with its Wi-Fi, key, address on the map and all settings back.
Restore right after a reset
You do not have to set everything up again. While the sensor is still on its own setup network, before it joins your Wi-Fi, the setup page already has Backup & restore.
Reset only the Wi-Fi
New router or new password? System → Delete configuration → Wi-Fi only forgets the network and keeps everything else. The sensor reopens its setup page and you connect it again.
Altruist Urban
LED strip
Local → Settings → LEDs: turn the strip on or off and set the brightness.
Altruist Insight
First setup
The same setup page, with one more choice: run Insight on its own, or together with an Urban outside.
Pair with your main Urban
Insight finds the Urban on your network, or you type its IP. The main Urban shares the first page of the e-ink screen with Insight’s own readings.
Add more Urbans
Local → Other Urbans: add a second or third sensor and give it a name for the screen, like kitchen or balcony. Each one gets its own page.
Sleep analytics
Set the hours of your night, choose whether the report opens on the screen every morning and until when, and add the outdoor dust and noise from your Urban to the score.
Date format
Local → System → Date format: MM/DD/YYYY, DD.MM.YYYY or YYYY-MM-DD. The e-ink header and the Status page follow your choice.
LEDs and night hours
Turn the LEDs on or off, set the brightness and the hours when they switch off and back on. They dim gradually before switching off. Set the same hour twice to keep them on all night.
Stuck on a step? Scan the QR code on your Altruist: the AI setup assistant walks you through every screen. A guide to moving from the previous firmware is coming next.